
Application Instructions
ARS Nails nail wraps
Select instructions for manicure or pedicure.
Step-by-step. Visual. Proven in practice.
Manicure Instructions
Manicure
Step-by-step
instructions
01
Nail wrap preparation
Remove the excess white part of the nail wrap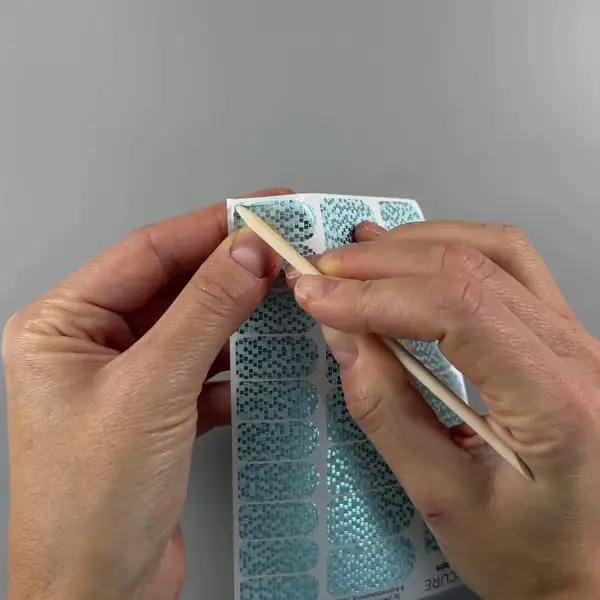 INSTRUCTION
 02
Base coat (optional)
Apply regular polish base coat to the nails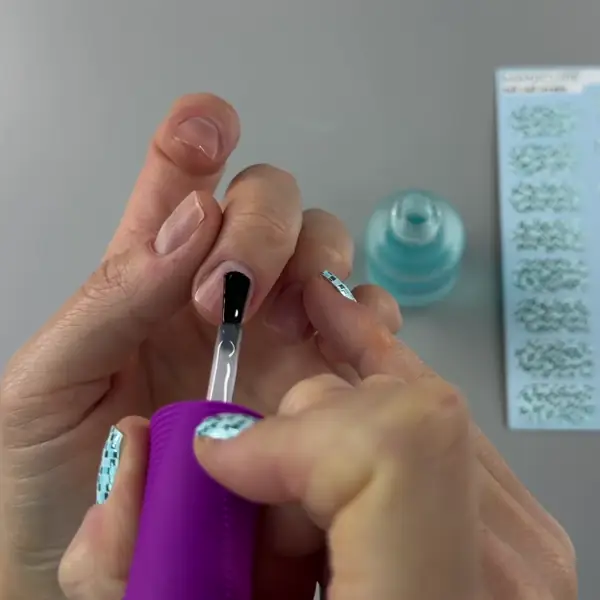 INSTRUCTION
 03
Complete drying
Wait until the polish is completely dry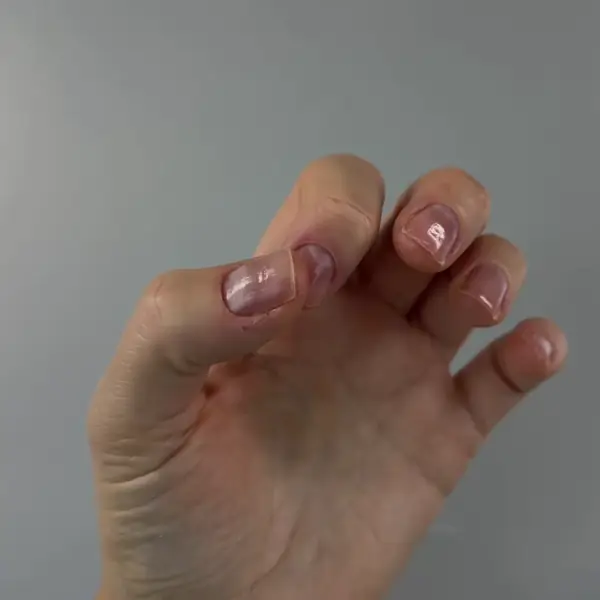 INSTRUCTION
 04
Nail measurement
Measure the width of the nails with a ruler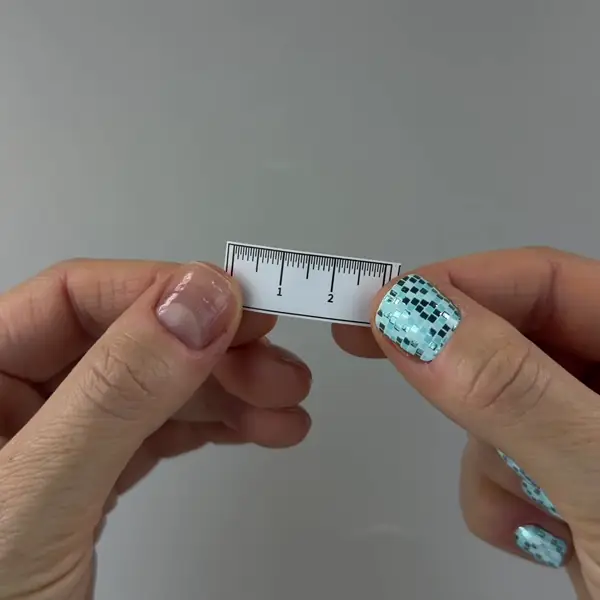 INSTRUCTION
 05
Choosing nail wrap size
Choose a nail wrap 1 mm narrower than the nail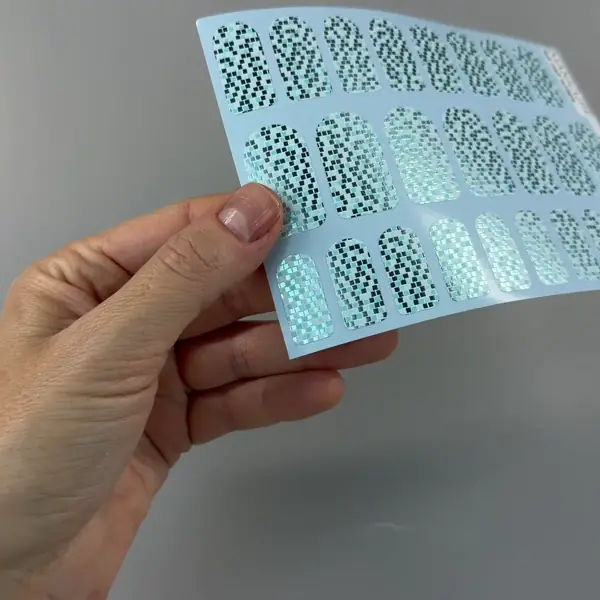 INSTRUCTION
 06
Separating the nail wrap
Remove the nail wrap from the base using an orange stick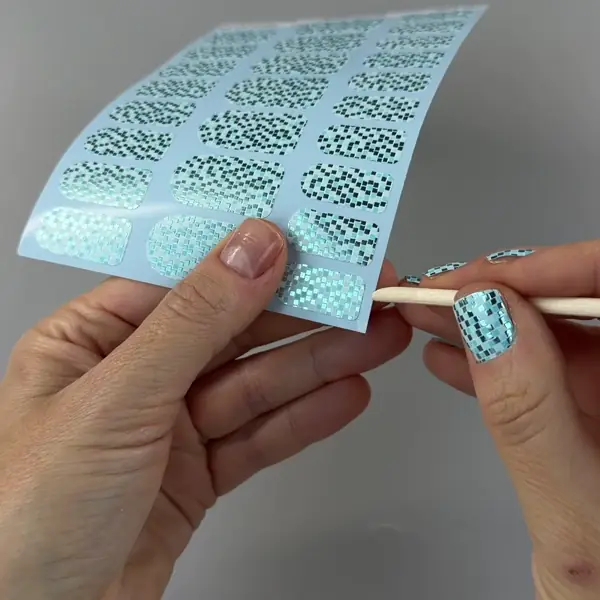 INSTRUCTION
 07
Forming an arch
Slightly squeeze the nail wrap to give it an arched shape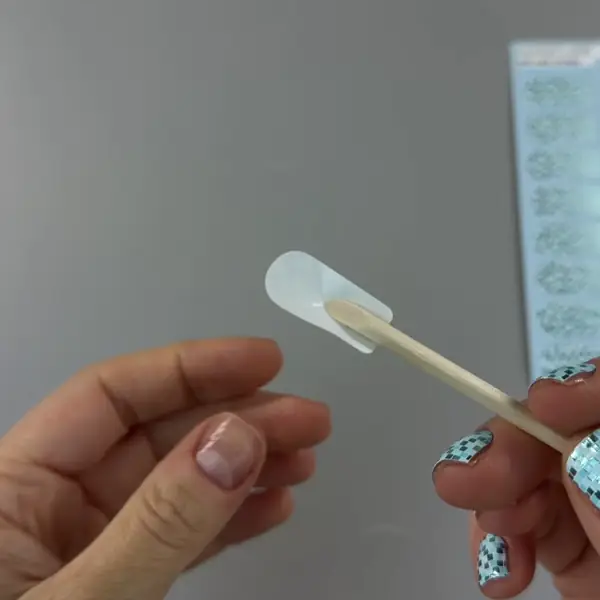 INSTRUCTION
 08
Positioning at the cuticle
Bring the nail wrap as close to the cuticle as possible without touching it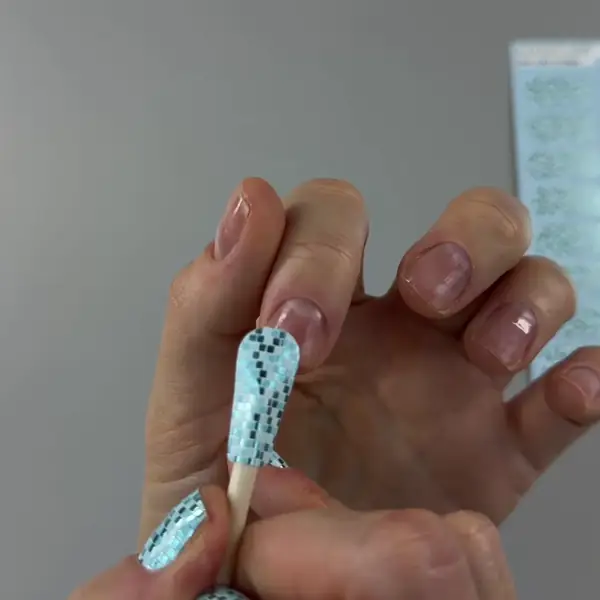 INSTRUCTION
 09
Center fixation
Stick the nail wrap to the center of the nail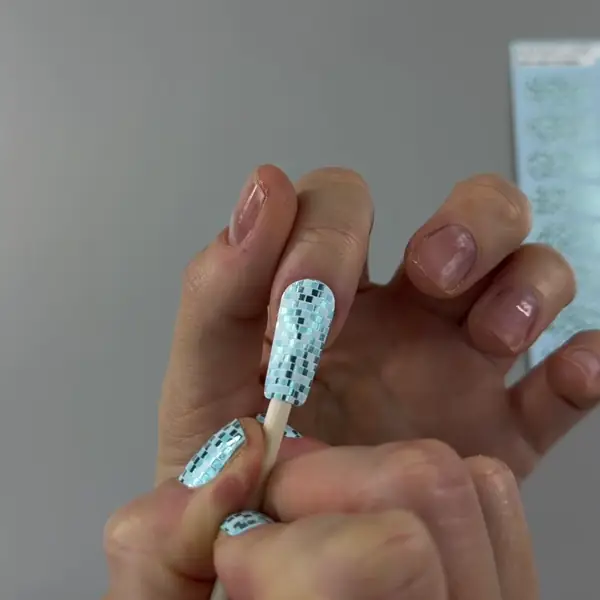 INSTRUCTION
 10
Initial smoothing
Smooth the nail wrap down the center and press it under the free edge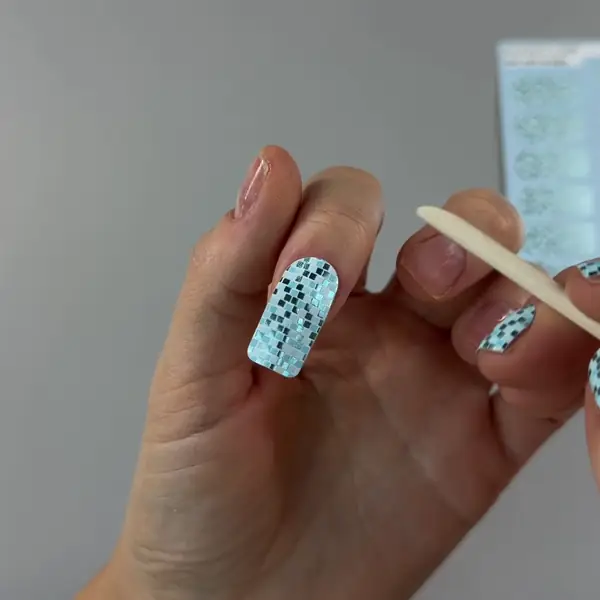 INSTRUCTION
 11
Fixing the first side
Smooth one side with an orange stick, applying tension and pressing it under the edge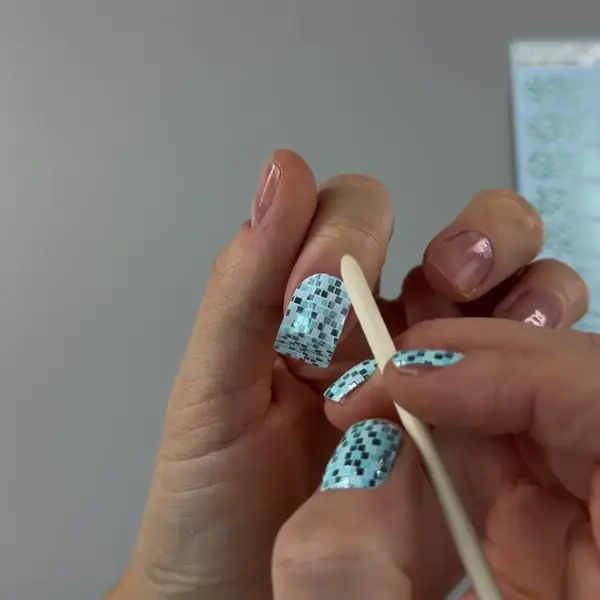 INSTRUCTION
 12
Fixing the second side
Repeat on the other side INSTRUCTION
 13
Pressing to the edge
Press the nail wrap to the edge along the entire edge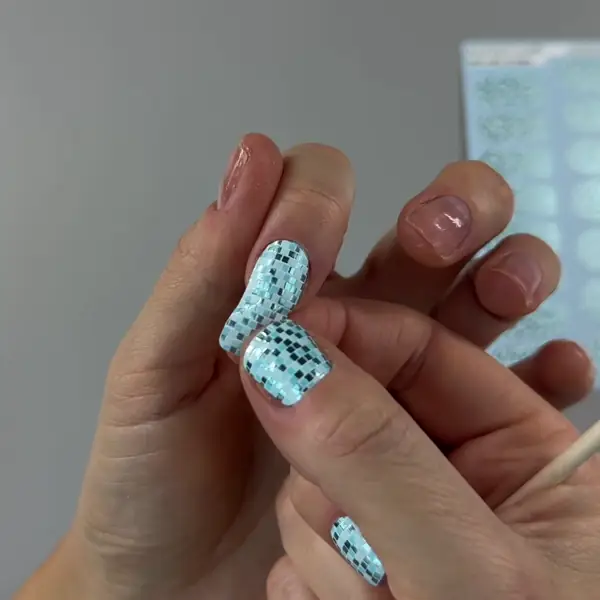 INSTRUCTION
 14
Filing the edge
Before each movement of the file, press the nail wrap to the edge. File the nail wrap with a soft file (240-280 grit)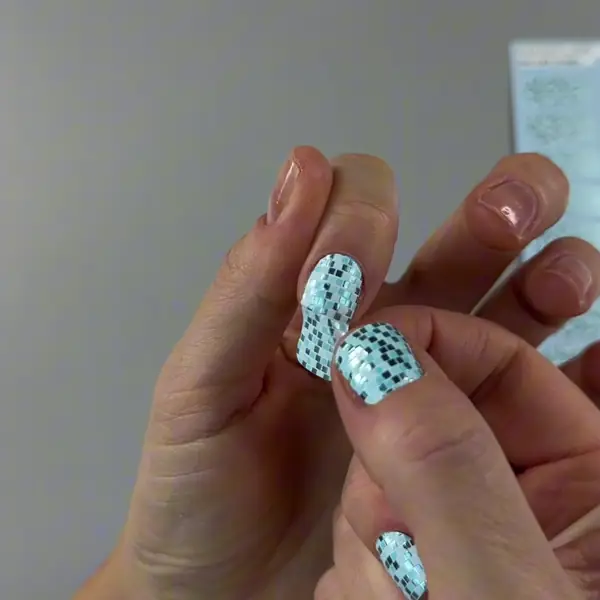 INSTRUCTION
 15
Removing the excess
Lightly remove the residue after filing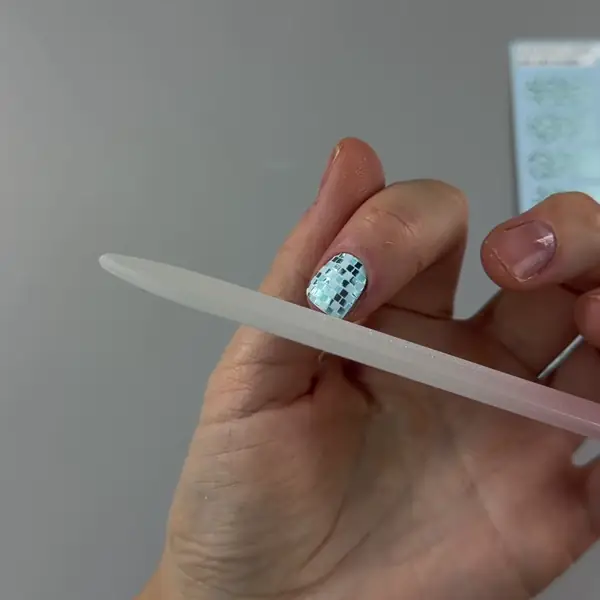 INSTRUCTION
 16
Top coat
Apply top coat: 2 thin layers of regular top coat or a thin layer of gel top coat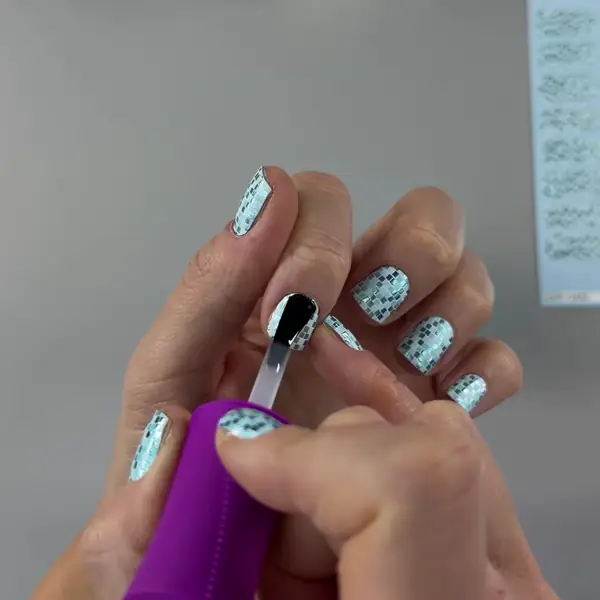 INSTRUCTION
 Removing nail wraps coated with gel top
01
Lifting the nail wrap
Moisten an orange stick with nail polish remover and carefully lift the nail wrap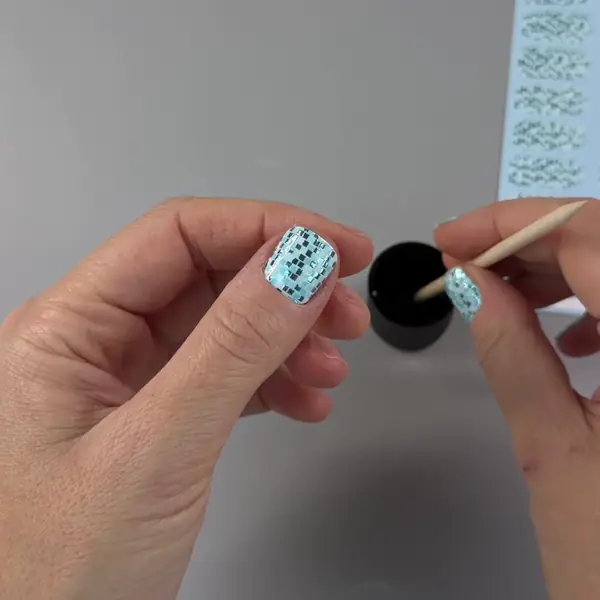 Removal. Method 1
 02
Dissolving the adhesive
Moving along the nail wrap, dissolve the adhesive, periodically moistening the stick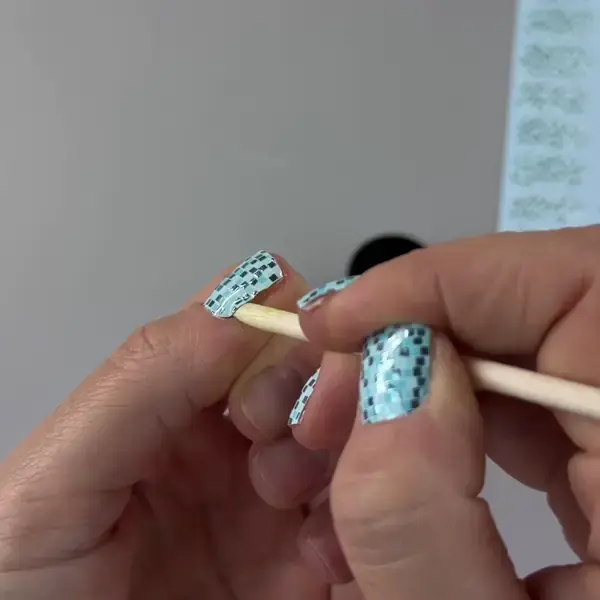 Removal. Method 1
 03
Final cleaning
Remove the remaining adhesive with a wipe and nail polish remover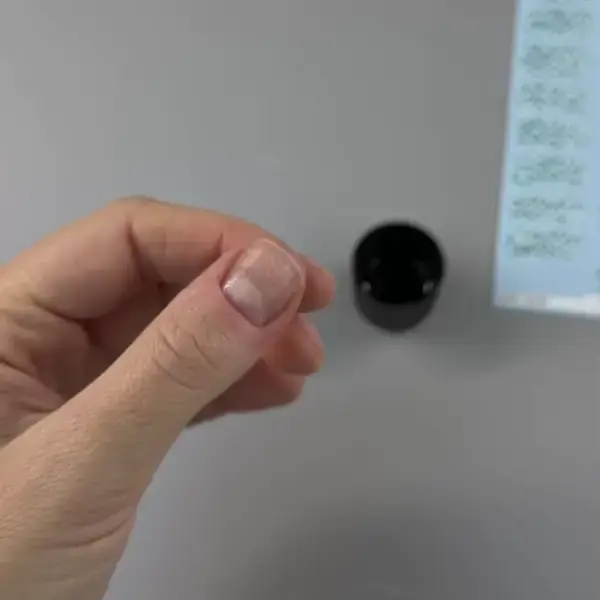 Removal. Method 1
 Removing nail wraps coated with regular top
01
Softening the nail wrap
Apply gel polish remover on the nail wrap without touching the skin and wait a few minutes until the nail wrap softens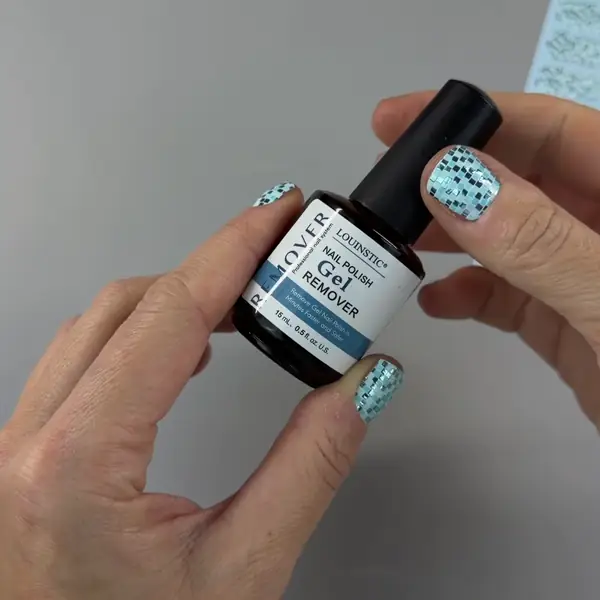 Removal. Method 2
 02
Removing the nail wrap
Remove the nail wrap with an orange stick or a wipe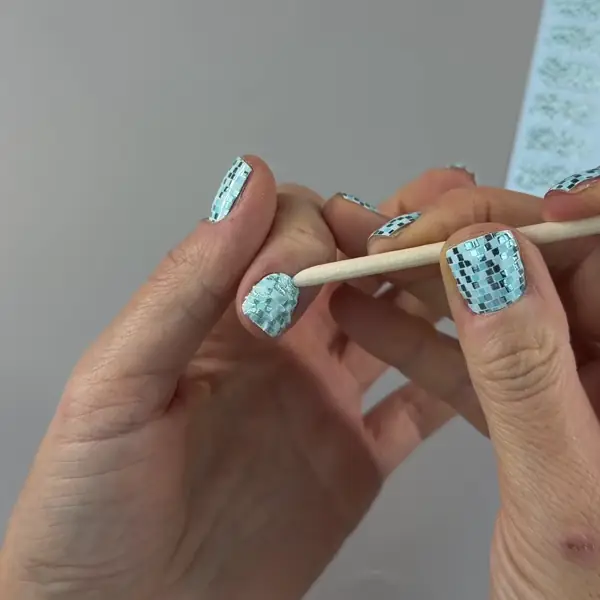 Removal. Method 2
 03
Final cleaning
Wipe the nails with a wipe and nail polish remover, removing adhesive residue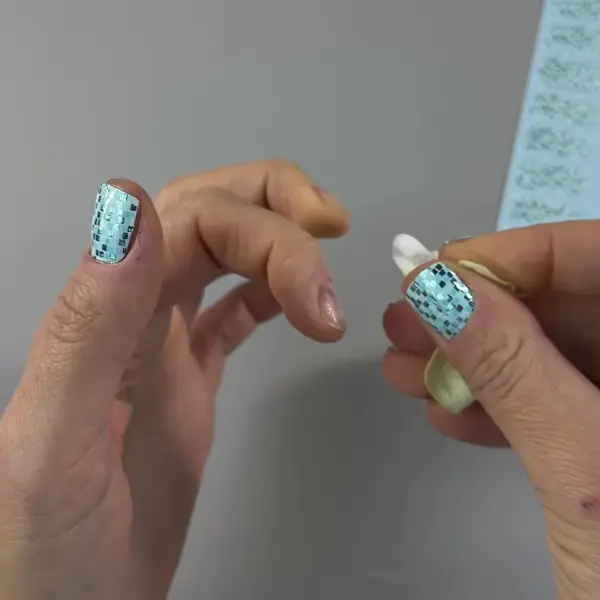 Removal. Method 2
 Pedicure
Step-by-step
instructions
01
Nail wrap preparation
Remove the excess white part of the nail wrap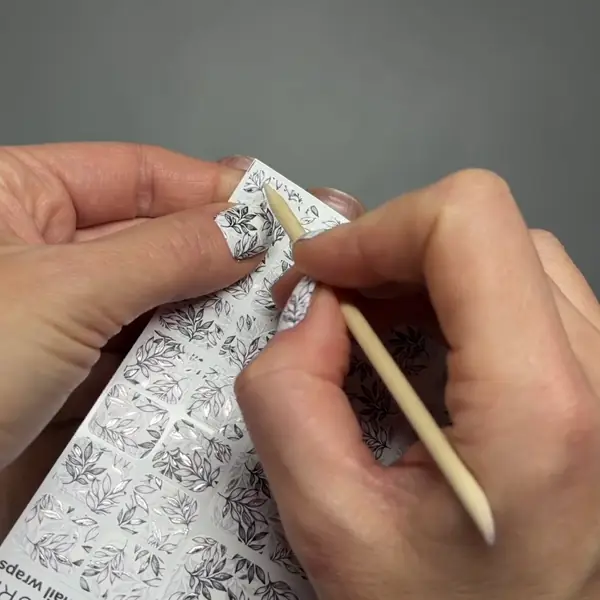 INSTRUCTION
 02
Nail measurement
Measure the width of the nails with a ruler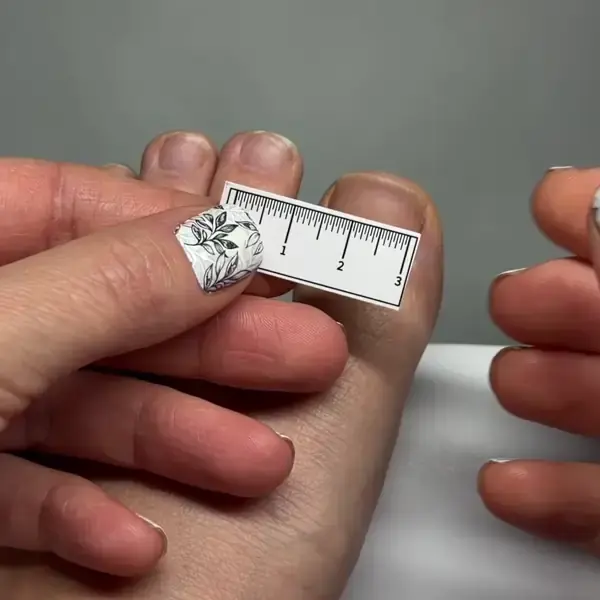 INSTRUCTION
 03
Choosing nail wrap size
Choose a nail wrap 1 mm narrower than the nail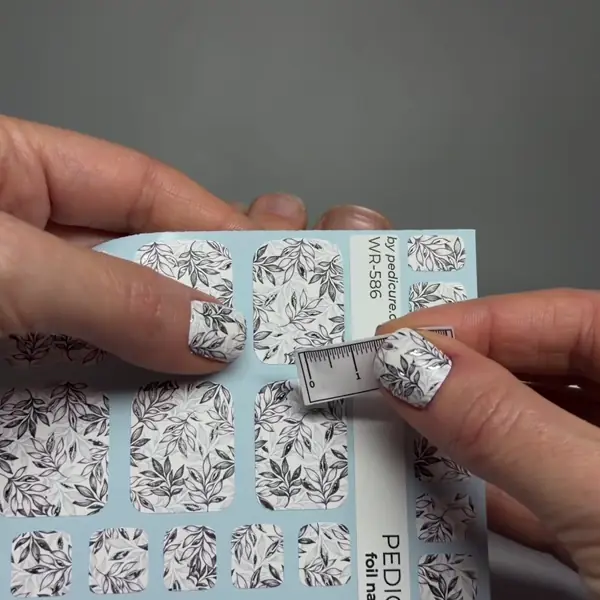 INSTRUCTION
 04
Cutting the nail wrap
Cut out the nail wrap along with its paper base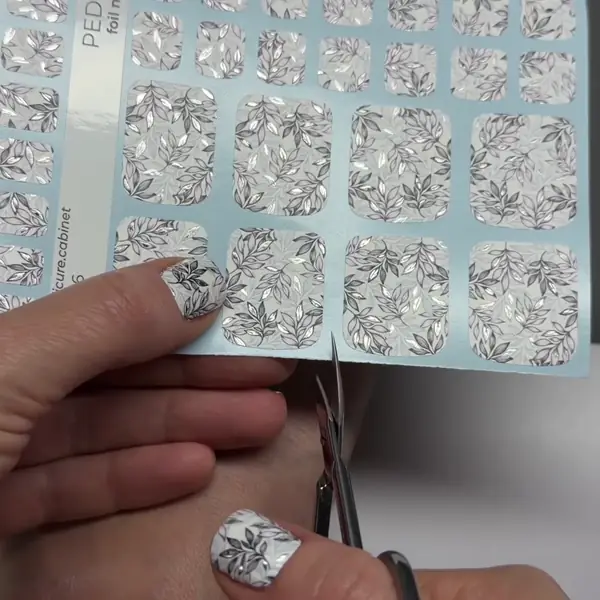 INSTRUCTION
 05
Fitting the nail wrap
Test fit the nail wrap to the nail and trim if necessary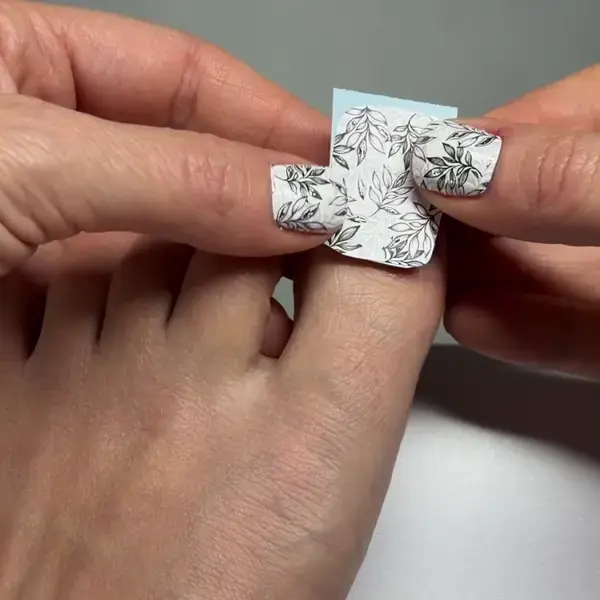 INSTRUCTION
 06
Fitting the nail wrap
Test fit the nail wrap to the nail again INSTRUCTION
 07
Base coat (optional)
Apply regular polish base coat to the nails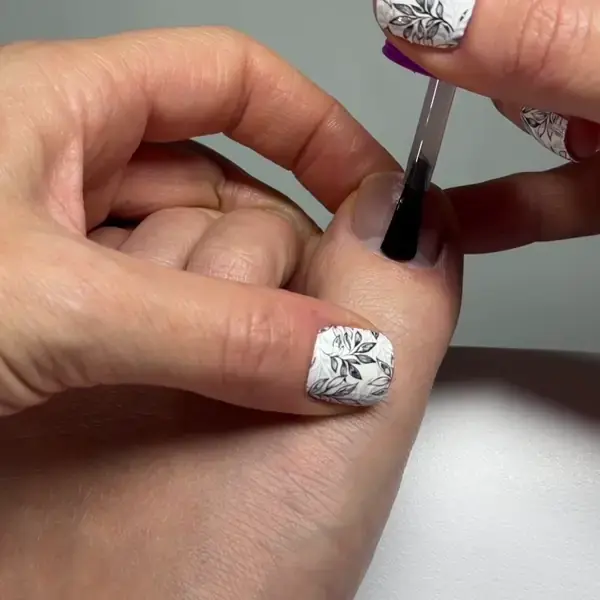 INSTRUCTION
 08
Complete drying
Wait until the polish is completely dry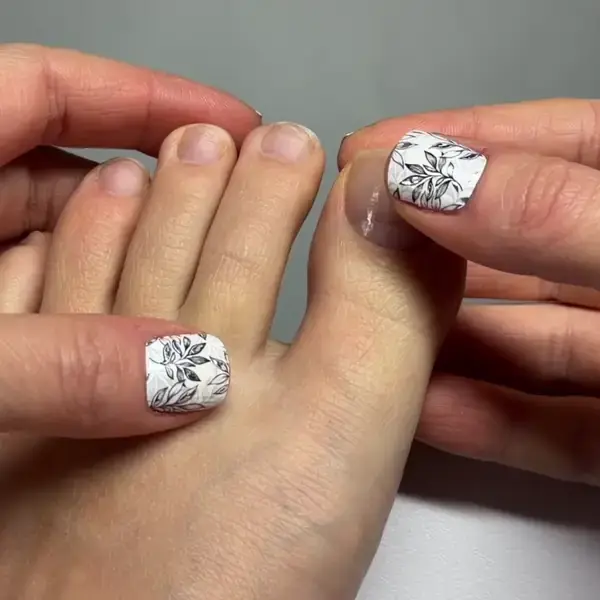 INSTRUCTION
 09
Separating the nail wrap
Remove the nail wrap from the base using an orange stick INSTRUCTION
 10
Forming an arch
Slightly squeeze the nail wrap to give it an arched shape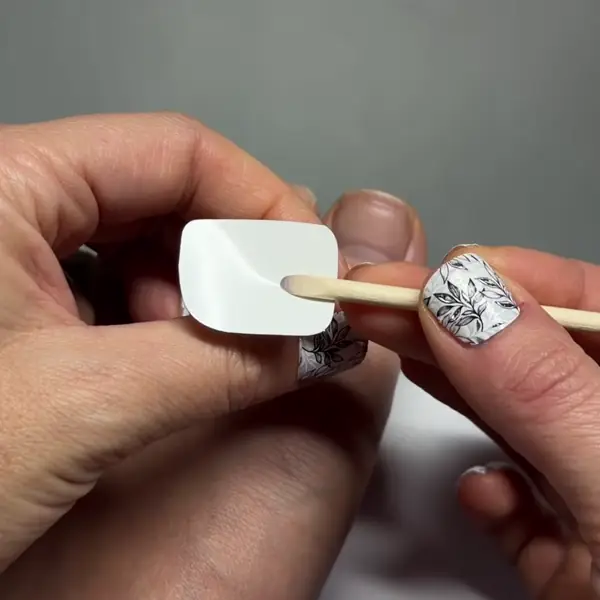 INSTRUCTION
 11
Positioning and fixation
Bring the nail wrap as close to the cuticle as possible without touching it, and stick it to the center of the nail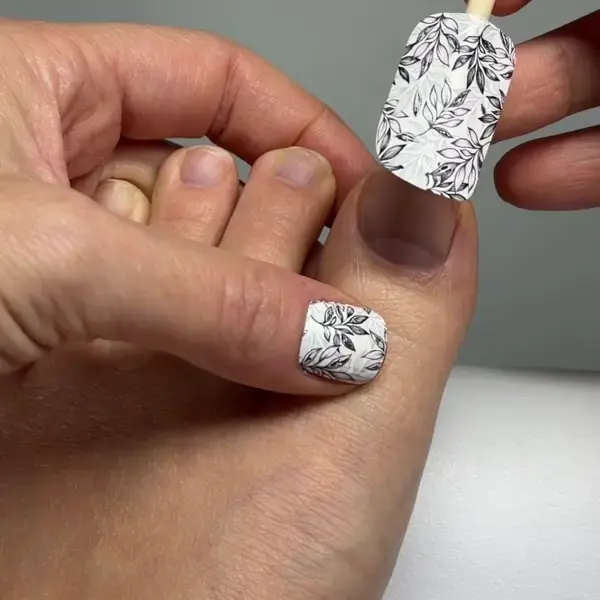 INSTRUCTION
 12
Initial smoothing
Smooth the nail wrap down the center and press it under the free edge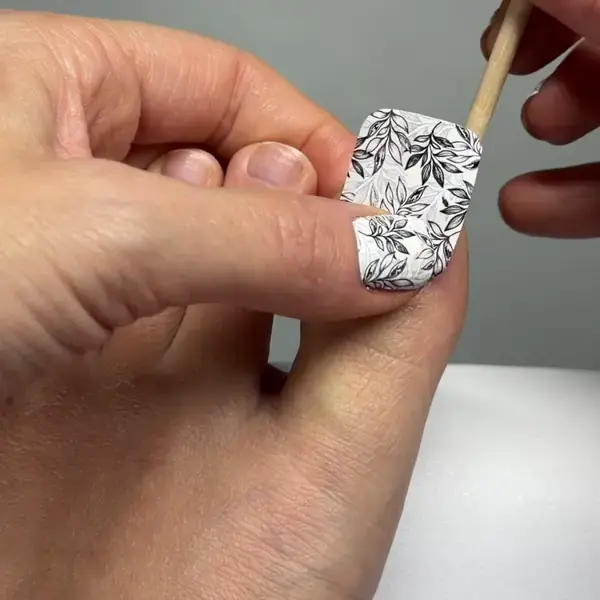 INSTRUCTION
 13
Fixing the first side
Smooth one side with an orange stick, applying tension and pressing it under the free edge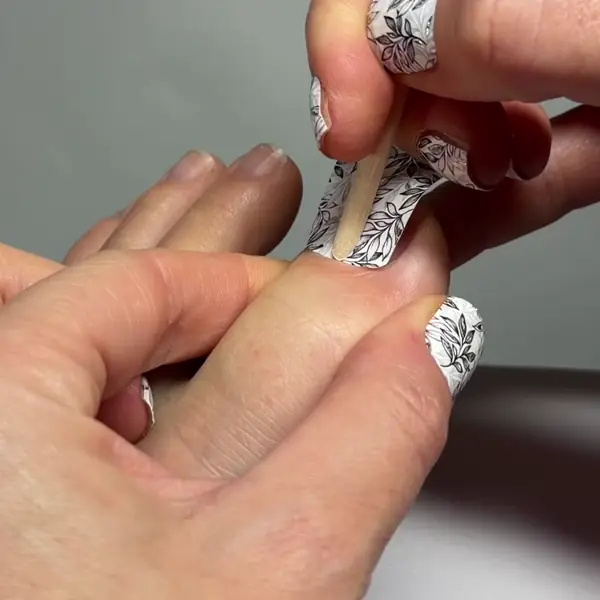 INSTRUCTION
 14
Fixing the second side
Repeat on the other side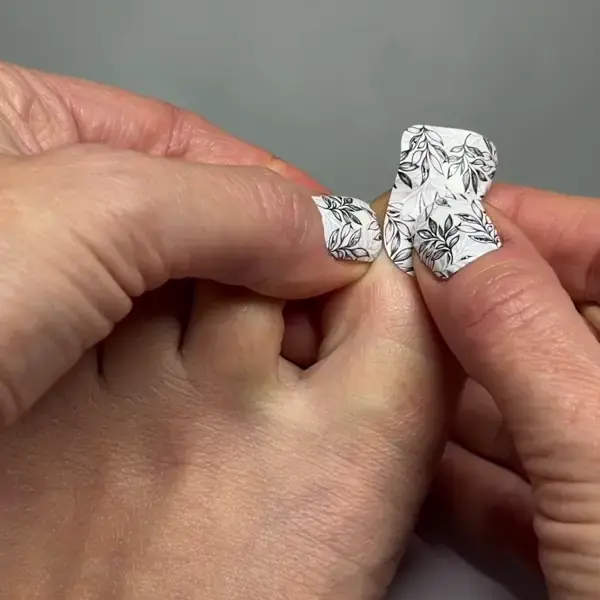 INSTRUCTION
 15
Pressing to the edge
Press the nail wrap to the edge along the entire edge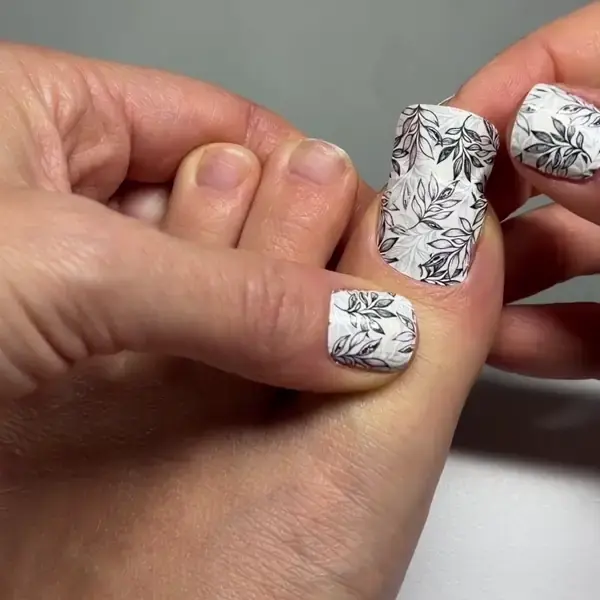 INSTRUCTION
 16
Filing the edge
Before each movement of the file, press the nail wrap to the edge. File the nail wrap with a soft file (240-280 grit)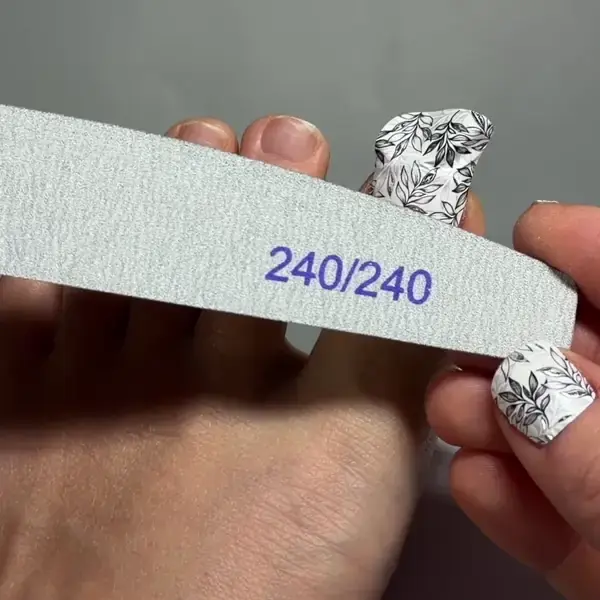 INSTRUCTION
 17
Removing the excess
Lightly remove the residue after filing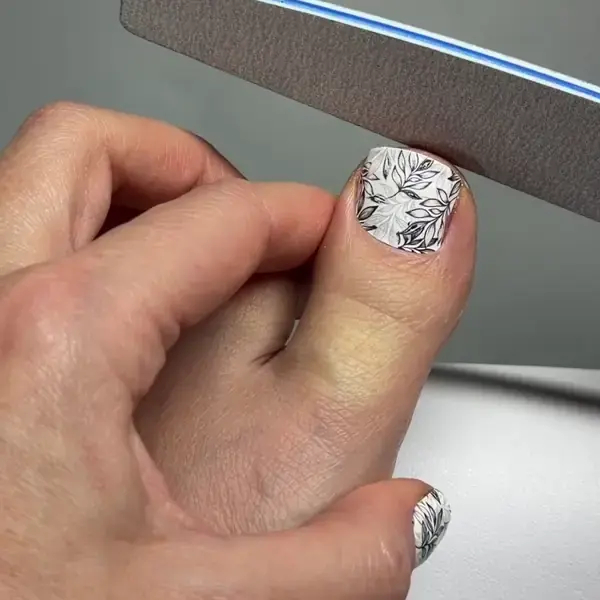 INSTRUCTION
 18
Top coat
Apply top coat: 2 thin layers of regular top coat or a thin layer of gel top coat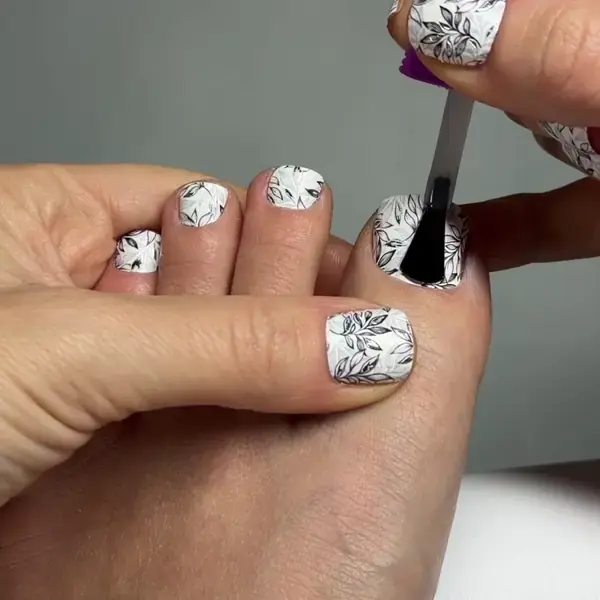 INSTRUCTION
 Removing nail wraps coated with regular top
01
Softening the nail wrap
Apply gel polish remover on the nail wrap without touching the skin and wait a few minutes until the nail wrap softens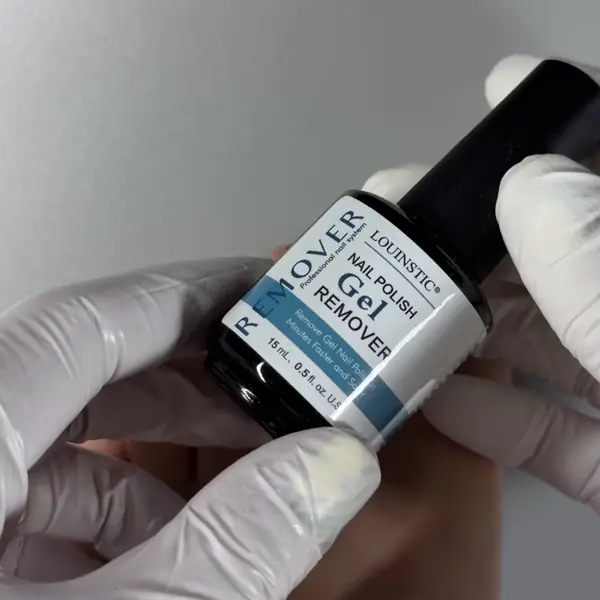 REMOVAL
 02
Removing the nail wrap
Remove the nail wrap with an orange stick or a wipe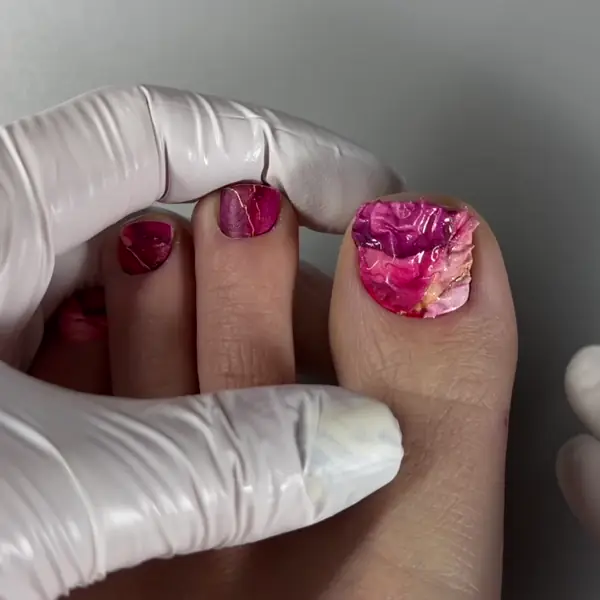 REMOVAL
 03
Final cleaning
Wipe the nails with a wipe and nail polish remover, removing adhesive residue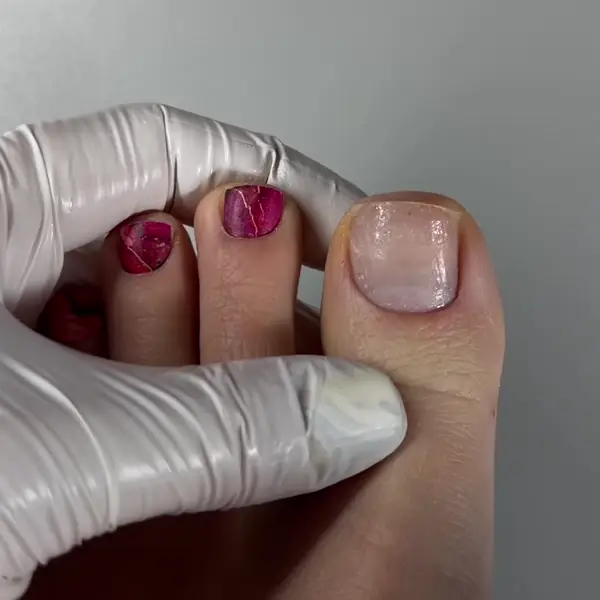 REMOVAL